 |
USE Virtual Private
Networks ( VPN ) TO PROTECT YOURSELF FROM ONLINE
HARASSMENT, POTENTIAL LAWSUITS, AND DISABLE P2P THROTTLING. |
|
|
|
|
Configure VPN Connection Introduction on
Mac OS X 10.5.x
(
Configure VPN Connection
Introduction on Windows XP or Windows 2000 Click Here )
(
Configure VPN
Connection Introduction on Windows Vista Click Here )
(
Configure VPN
Connection Introduction on Mac OS X 10.4.X
Click Here )
(
Configure VPN
Connection Introduction on Linux OS
Click Here ) |
| In this article we will
learn how to configure a connection to a virtual private network (VPN)
using Mac OS X 10.5.X. This article will show you how to create a new VPN
connection using Mac OS X 10.5.X. By creating an encryption tunnel
through the Internet, data can be passed safely. |
|
VPN Overview |
A VPN is a private network
created over a public one. It’s done with encryption, this way,
your data is encapsulated and secure in transit – this creates
the ‘virtual’ tunnel. A VPN is a method of connecting to a
private network by a public network like the Internet. An
internet connection in a company is common. An Internet
connection in a Home is common too. With both of these, you
could create an encrypted tunnel between them and pass traffic,
safely - securely.
If you want to create a VPN connection you will have to use
encryption to make sure that others cannot intercept the data in
transit while traversing the Internet. Mac OS provides a
certain level of security by using Point-to-Point Tunneling
Protocol (PPTP) or Layer Two Tunneling Protocol (L2TP). They are
both considered tunneling protocols – simply because they create
that virtual tunnel just discussed, by applying encryption.
|
|
|
Configure a VPN with Mac OS X
10.5.X |
If you want to configure a VPN
connection from a Mac OS X 10.5.X client computer you only need what
comes with the Operating System itself, it's all built right in.
To set up a connection to a VPN, do the following:
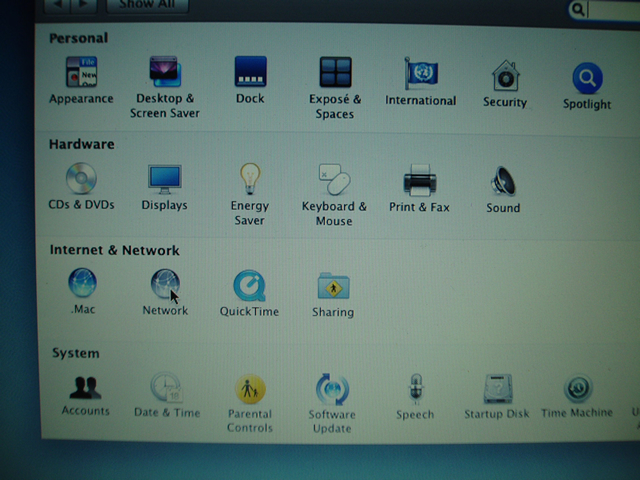
| 1. Open the Network program from the System
reference |
 |
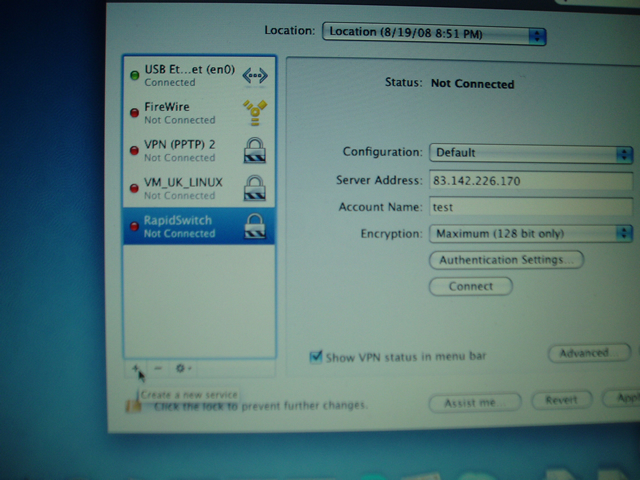
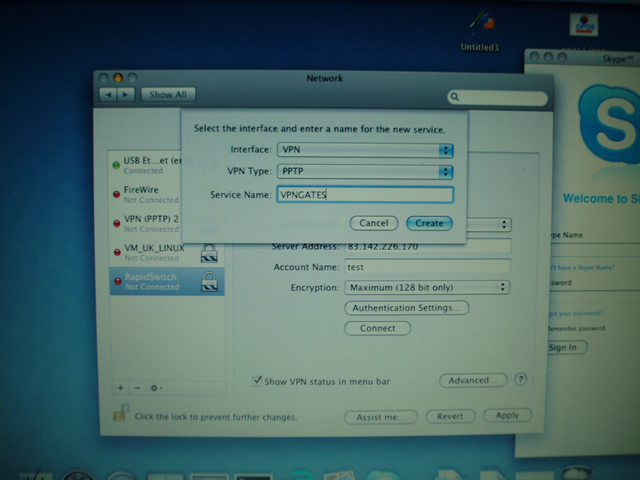
| 2. Click "+" on the bottom of left |
 |
| 3. Click Dropdown List of Interface |
 |
| 4. Choose "VPN" |
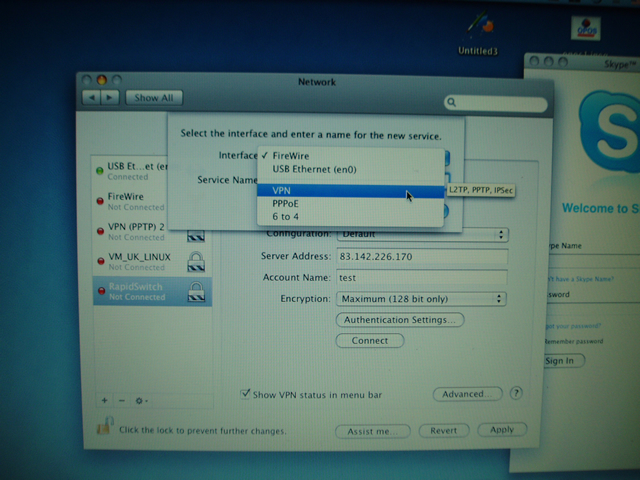 |
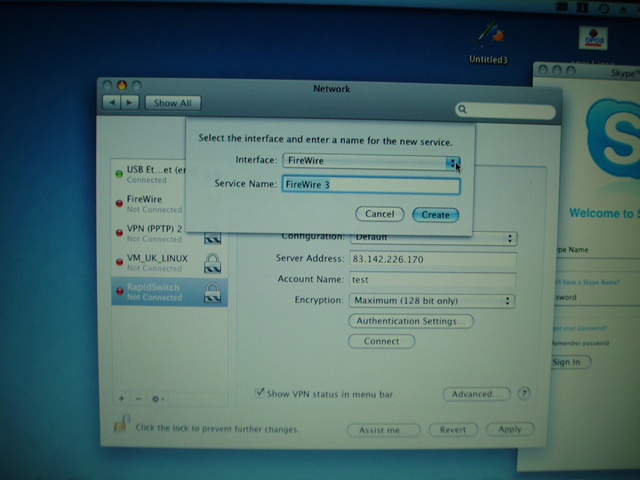
| 5. Select "PPTP" for VPN Type and Type some words
in text box of Service Name, then click button "Create" |
 |
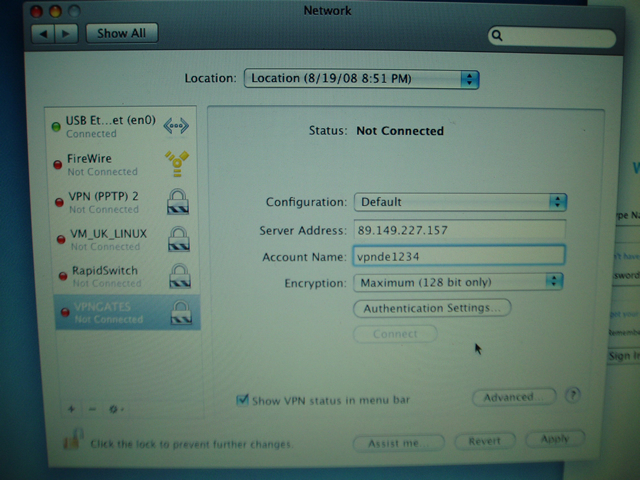
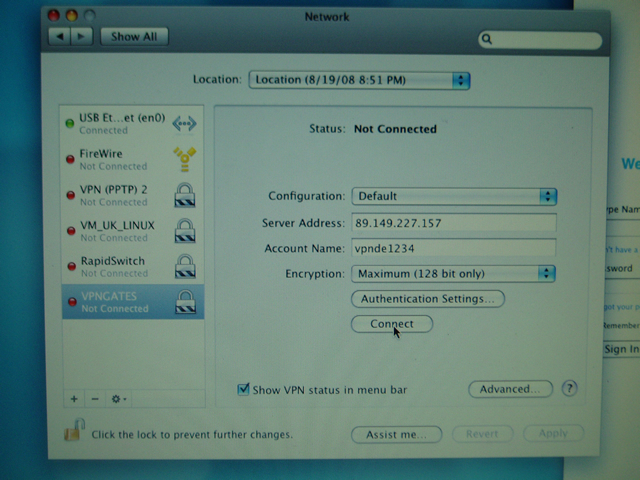
| 6. Enter Server address, Account Name that we
send you in e-mail, Choose Maximum (128 bit only) for
Encryption option, then click
button "Authentication Settings" and enter your vpn
account password, and click button "OK".
Then click button "Advanced" |
 |
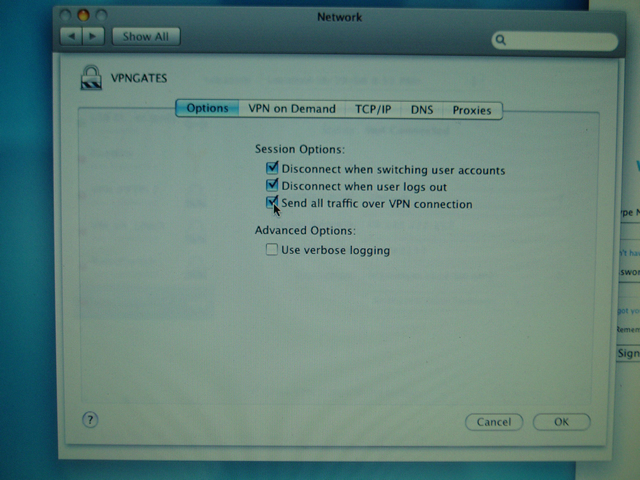
| 7. Click checkbox "Send all traffic over VPN
connection", then click button "OK" |
 |
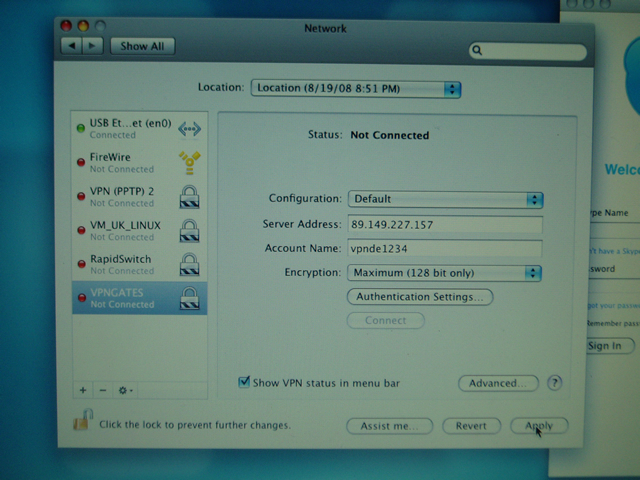
| 9. Click button "Apply" to save your vpn setting. |
 |
| 9. Then click button "Connect" to connect to our
VPN server. |
 |
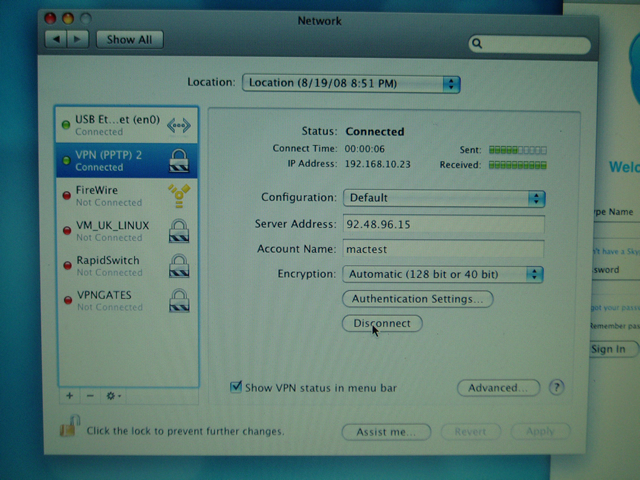
| 10. You can click button "Disconnect" at any time
when you want to disconnect from our vpn server. |
 |
|
|