System Requirements
Before setting up your VPN connection, make sure your version of Windows Vista is up to date by running Windows Update.
|
|||||
|
|||||
Configure VPN Connection Introduction on Windows Vista
(
Configure VPN Connection
Introduction on Windows XP or Windows 2000 Click Here ) |
|||||
|
Setting up PublicVPN access under Windows Vista is simple. The following
instructions go step–by–step through the creation process. These
instructions work under all the client–side variations of Windows Vista,
namely Home Basic, Home Premium, Business, and Ultimate.
The things to click and places to type your information are hilighted in red, yellow, green, and/or blue. System RequirementsBefore setting up your VPN connection, make sure your version of Windows Vista is up to date by running Windows Update. 1. Make sure your system is up–to–dateBe sure that you run Windows Update before setting up your VPN connection. 2. Open the Control PanelsFirst, click on the Start button and click “Control Panels”. This opens up the “Control Panel Home.” 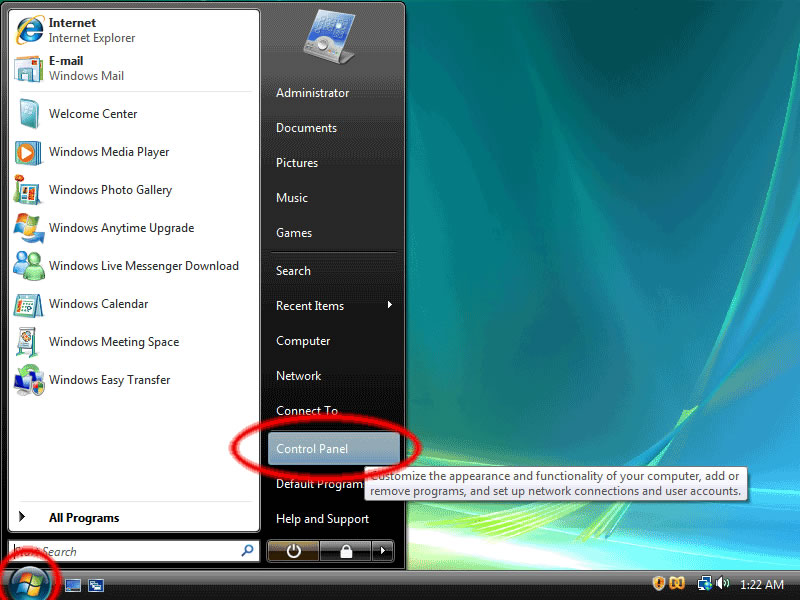
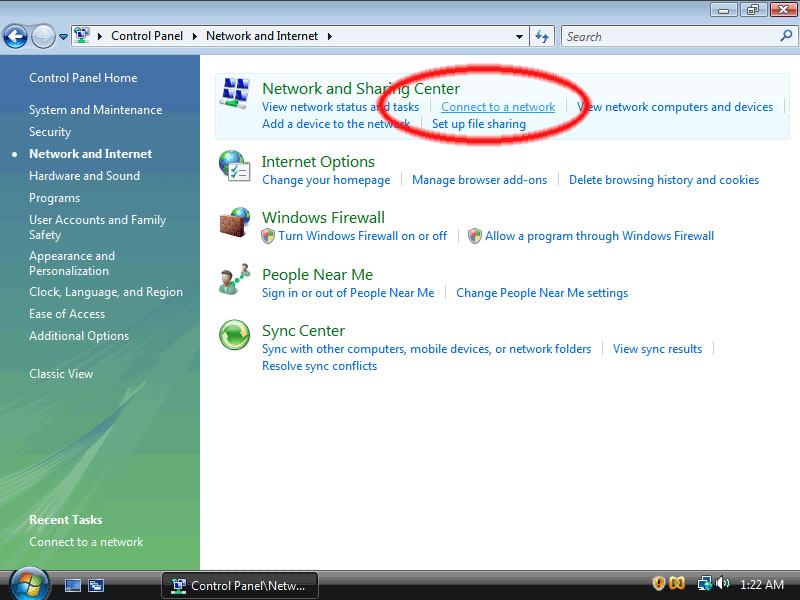
3. Go to the “Network and Internet” panelNext, click on the “Network and Internet” control panel, which is circled in red below. 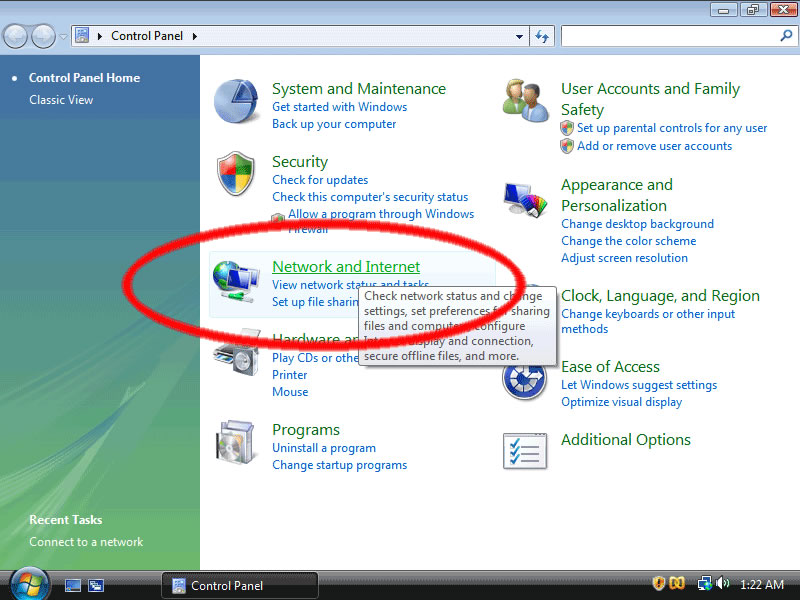 5. Set up the VPN connectionThe next screen may not look quite like this if you have networks already defined. In any case, click on “Set up a connection or Network.” 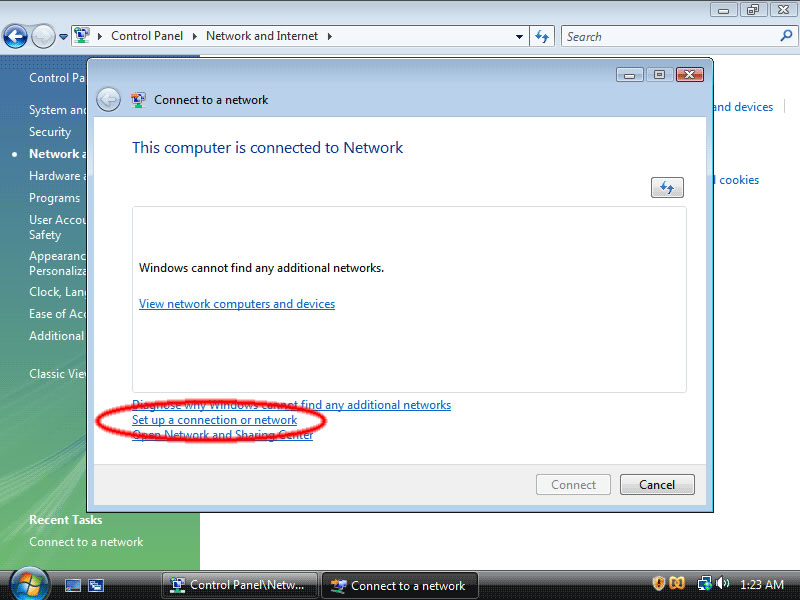
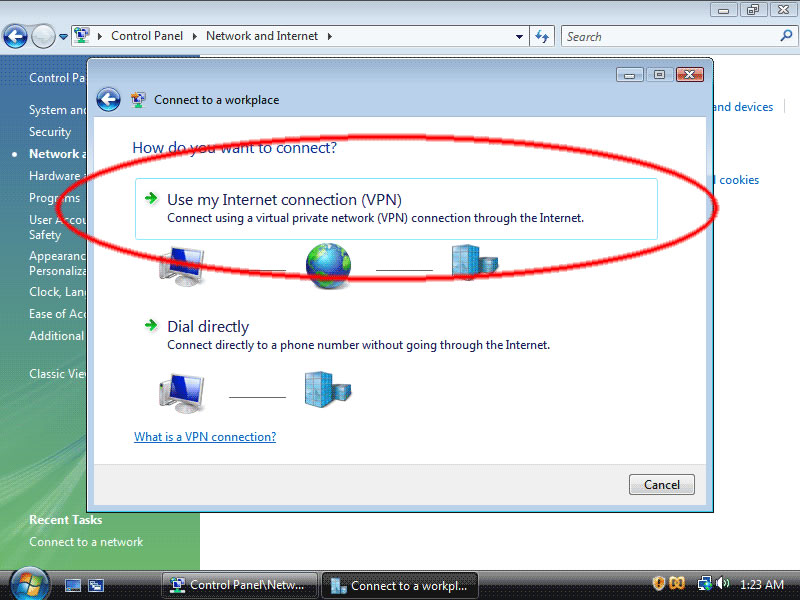
6. Choose the Connection TypeOn the next screen, click on “Connect to a workplace” then click “Next.” 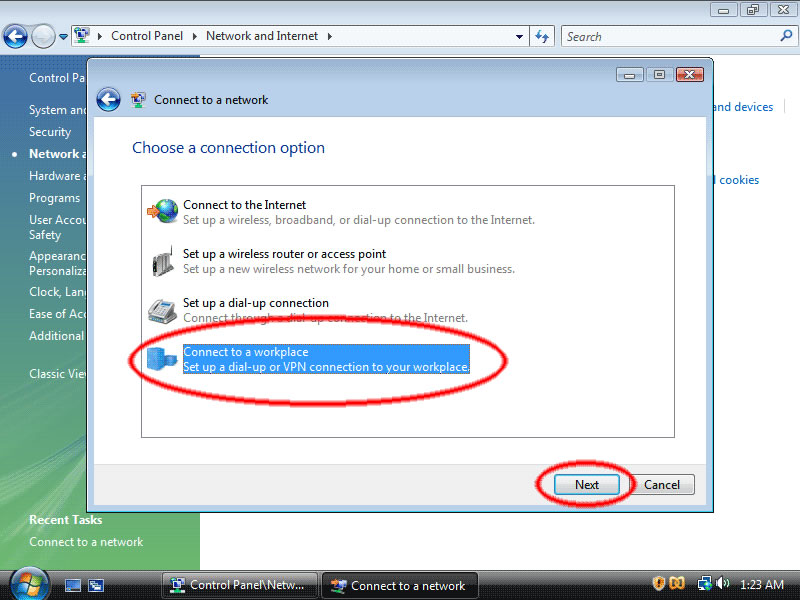
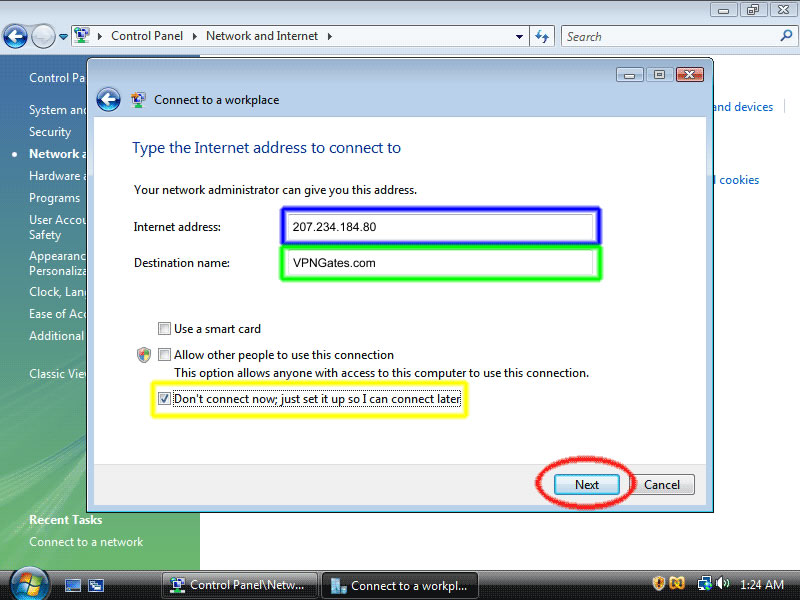
8. Enter the server informationNow, enter the server information.
In the text box labelled ‘Internet address’ ( hilighted in blue) type ‘207.234.184.80’. This is the Internet address of the vpngates.com servers. In the text box labelled ‘Destination name’ (hilighted in green) type ‘vpngates.com’. This is the name of the connection, and will show up in the “Connect to a network” screen when we’re done. Lastly, make sure that the checkbox labelled “Don't connect now; just set it up so I can connect later” (hilighted in yellow) is checked. Then click the “Next” button. 9. Enter your VPNGates.com username and passwordIn this screen, enter your VPNGates.com username and password. This is the same username and password that you use to log in to the VPNGates.com website. 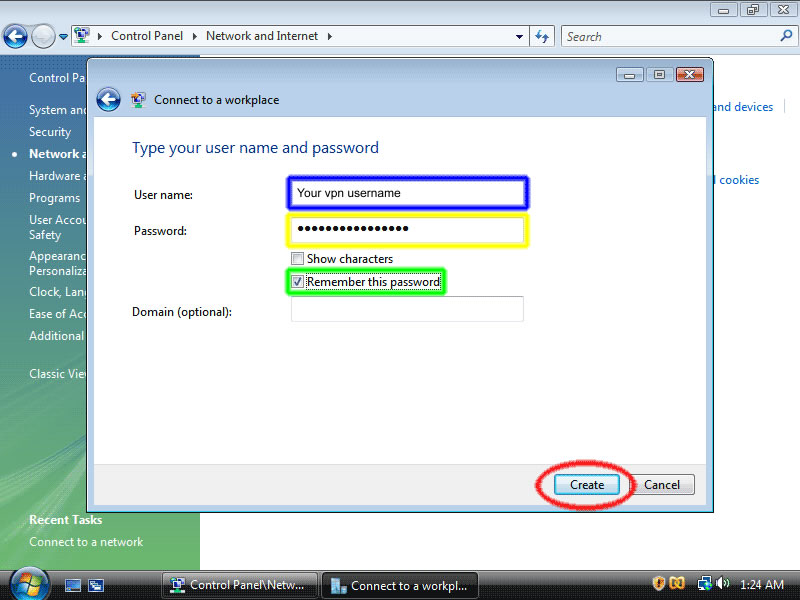
In the text box labelled “User name:” (hilighted in blue), enter your VPNGates.com username. In the text box labelled “Password:” (hilighted in yellow), enter your VPNGates.com password. Optionally, check the “Remember this password” checkbox (hilighted in green) and you won’t have to enter your password when you connect to VPNGates.com. Then, click the ”Create” button. 10. Connection ReadyYou should see this screen next. Click the “Close” button to return to the “Network and Internet” screen. 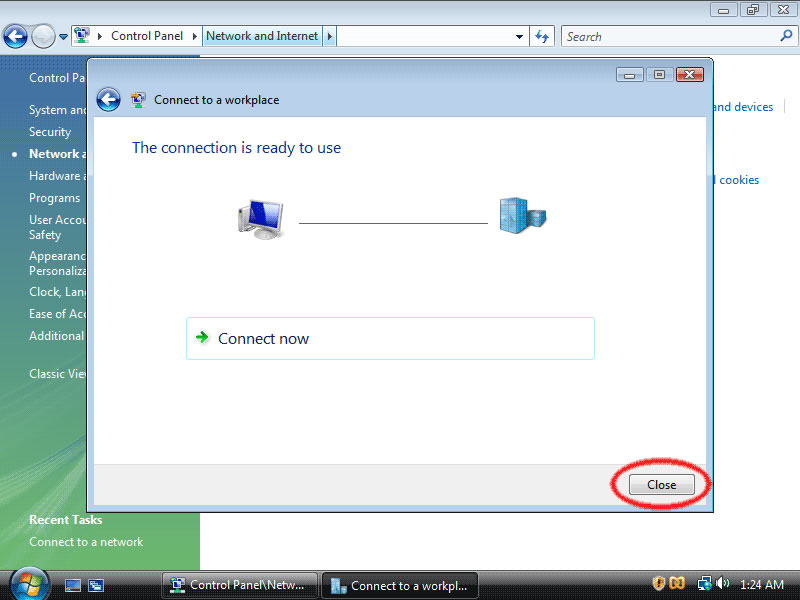
12. Then click on the VPNGates.com entry and click “Connect”. 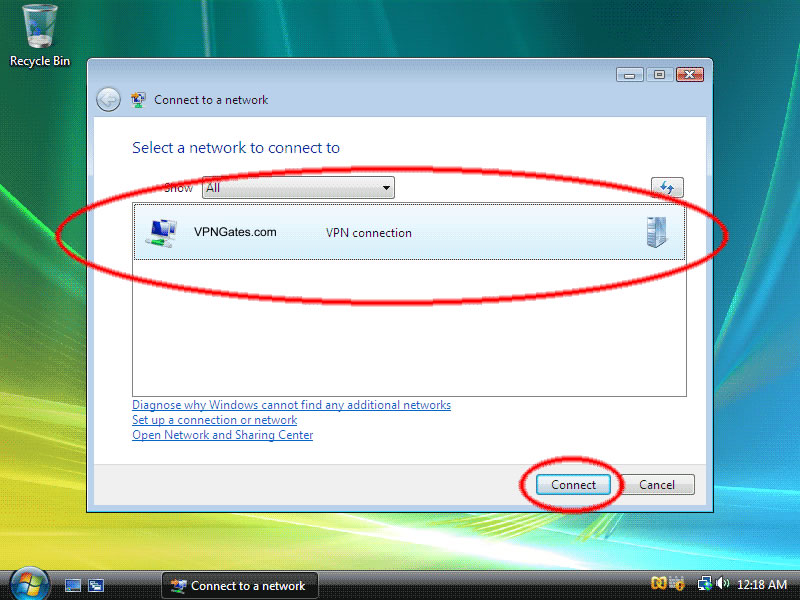 |